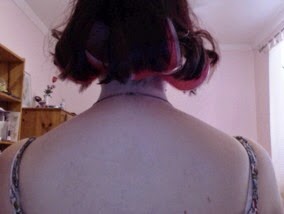
Hello boys and girls,
Today, we're going to divulge into my hair styling routine.
...Well, sort of. More Marla-has-no-time-to-do-this-from-start-to-finish-so-we-will-look-at-how-I-style-it-dry-routine.
I should point out that these waves are completely heatless, and I only started using my blow dryer with it as I have a bad case
of the frizzles. You can easily achieve the same effect using zero heat tools,
which is pretty neat if I do say so myself.
For this hairstyle, you will need:
- A leave-in styling product (mousse, gel, leave-in conditioner..whatever you fancy will do)
- Hair ties
- Bobby pins
- Dry Shampoo (in case you're doing it on a day that you haven't washed it, that is)
- Large velcro rollers
- Hair dryer (optional)
If this was me styling it straight out of
the shower, I would let my hair air dry until it was about 60-70% dry, then I
would apply the ever so lovely Schwarzkopf Taft Cashmere Touch Power Mousse.
 |
| I apologise for the crap quality, I'll try to have a better camera for next time! |
Next, I would rough blow dry my hair until
it was about 90% dry, then go in with my tension brush that I bought off of
eBay.
With this handy device, I would make sure
the ends of my hair were straight but make sure to direct them inwards rather
than outwards. This is important for the waves, if you want the ends to sit
straight and not flick out in every possible direction. However, I’m sure this
effect can be achieved by using any brush you have laying around to curl the
ends inwards as you dry (you can also do this by waiting until the hair is 90%
dry and just brushing the ends inwards before styling, if you’re more of a no
heat kind of lady/gent). Here’s a little
demo photo of how I would use the tension brush:
|
| I basically have the blow dryer follow the tension brush down my hair. Easy stuff. |
Now for the lazy braids!
First, I section off my bangs, like this:
 |
| Done. Good. |
Next, I keep them out of the way
temporarily with this beautiful do:
 |
| Rockin it. |
Now is the time for lazy braiding. When doing
this style, I highly recommend you start from the front of the hair and move
backwards. I didn’t used to do this, and my hair was a half crimped, half
ringletty disaster zone. To ensure hair on fleek, start with two sections like
this:
Then cross the section closest to the face
over the other:
Now, this is literally as tricky as it
gets. As you twist each section over the other, pick up a section of hair and
combine it with the section you are going to cross over. Think of it as an
extremely lazy french braid. Keep twisting and twisting until you reach the end
of the braid, and secure with a hair tie of your choice.
Here’s how it should turn out:
 |
It's a work of art!
|
A sneaky tip is to curve the end of the braid
inwards before you go to bed. You can do this simply by pushing it towards the face in a backwards-C shape. This will ensure that the ends won’t flick out
uncontrollably when you take them out in the morning, and is especially useful
for those who haven’t heat styled to begin with! :)
Complete the steps on the opposite side and
you have just made your very own itsy bitsy braids!
(and yes, I am aware I haven’t styled the
back….you must be patient)
I like to use bobby pins to keep my bangs
out of the way as I sleep. As this will be classed as second day hair by
tomorrow, I have generously coated my bangs in dry shampoo so I can
sleep-thrash my way to shiny, “just-washed” hair!
 |
| Werk it. |
For now, all that is left to do is to get
some well-needed beauty sleep.
In the morning, I will show you the result, as well as how I style the back
(see? Patience) and what products I use to get some volume and texture in my
hair.
Nighty night!
Obligatory “just-woke-up” selfie:
 |
| ...Did I say beauty sleep? |
Now the hair is obviously going to be
frizzed all the way to heck if you’re like me and can’t be bothered wrapping it
up. I do have one of those silk bonnet thingos, but I much prefer to sleep wild
and free (you do you, though!). This can easily be fixed later on in the
process, so don’t freak out on me, okay?
(P.S., sometimes if you sleep-thrash like a
beast, the braids can come out/become loose in your sleep. Never fear! Just
retie them up as you get ready for the day and you’ll still get some bootiful
waves)
After my shower, I like to use some of
these bad boys to style the back:
(Top tip: if you don’t want to use heat to
straighten your bangs after this step, I recommend dampening them, pulling them
taught and placing as many bobby pins as you can in them. This should make them
as straight as possible without needing to use your straightener on them as well)
The quantity and size of rollers I use
varies from day to day, but I’ve found recently that these massive can-sized
rollers get the back straight with a little curl inwards. Here’s how it turned
out:
A little messy, I know, but I am going for
a more textured look. It’s gonna be okay, trust me.
I tend to leave these for a minimum of how
long it takes to do my makeup, so about 20-30 minutes. They may fall out if you
don’t pin them in place, but I find I place them back in a few times during my
routine and still get the desired result.
This is what the waves look like after
being taken out of the braids (in slightly less shitty lighting):
 |
| Ta da! |
I like to use some of this V05 Give Me
Texture Dry Texturising Spray on the ends, then give them a scrunch or just
ruffle my fingers through it.
(I decided after I took my bangs out that
they were straight enough, so I skipped that heat step for today. More proof
that it’s not really necessary to do the heat steps I included!)
Next I take out my Taft Full On Rough n
Tough Styling Powder. Yes, this is marketed as a men’s product, but it was also
on sale and does the exact same thing my Toni and Guy styling powder did.
I pour a teeny weeny amount of this onto my
fingertips, then scrunch it in at the roots:
 |
| Va va VOOM! |
Now I’m going to calm my hair the frick
down by pinning the bangs behind my ears with bobby pins. Here is the finished
result:
I hope you enjoyed my no-heat method of achieving a messy, texturised bob!
I’m getting a pixie cut in a few days so I
can’t do any more bob tutorials, but this is all I really did with it so…RIP.
If you’d like to see a review on any of the products mentioned leave me a
comment down below! Any requests are welcome!
♡ Until next time ♡